birch-beer
Table of Contents
See https://github.com/GregorySchwartz/birch-beer for latest version.
Description
birch-beer is all about sweet trees. That is, visualizing hierarchical
structures where the elements are stored in leaves and parent nodes represent
all of the descendant leaves. Using branch scaling, weighted average color
blending, distance markers, and more, we can all create some home brewed
birch-beer together!
Installation
Use nix
Installing birch-beer using nix is the easiest way to install from source.
First, install nix following the instructions
on the website. Then run the commands:
git clone https://github.com/GregorySchwartz/birch-beer.git
cd birch-beer
nix-env -f default.nix -i birch-beer
Then the birch-beer command should be in your path! If you do not wish to use
nix or docker, then you can continue reading for dependencies and stack
installation (no longer supported).
Dependencies
You may require the following dependencies to build and run (from Ubuntu 16.04, use the appropriate packages from your distribution of choice):
- build-essential
- libgmp-dev
- libblas-dev
- liblapack-dev
- libgsl-dev
- libgtk2.0-dev
- libcairo2-dev
- libpango1.0-dev
- graphviz
Install stack
See https://docs.haskellstack.org/en/stable/README/ for more details.
curl -sSL https://get.haskellstack.org/ | sh
stack setup
Install birch-beer
Source
Probably the easiest method if you don't want to mess with dependencies (outside of the ones above).
git clone https://github.com/GregorySchwartz/birch-beer.git
cd birch-beer
stack install
Online
We only require stack (or cabal), you do not need to download any source
code (but you might need the stack.yaml dependency versions), just run the
following command to place birch-beer in your ~/.local/bin/:
stack install birch-beer
If you run into errors like Error: While constructing the build plan, the
following exceptions were encountered:, then follow it's advice. Usually you
just need to follow the suggestion and add the dependencies to the specified
file. For a quick yaml configuration, refer to
https://github.com/GregorySchwartz/birch-beer/blob/master/stack.yaml. Relies on
eigen-3.3.4.1 right now.
Docker
Different computers have different setups, operating systems, and repositories.
Do put the entire program in a container to bypass difficulties (with the other
methods above), we user docker. So first, install docker.
To get birch-beer (replace 0.1.0.0 with any version needed):
docker pull gregoryschwartz/birch-beer:0.1.0.0
To run birch-beer in a docker container:
sudo docker run gregoryschwartz/birch-beer:0.1.0.0 -h
To build the birch-beer image yourself if you want:
git clone https://github.com/GregorySchwartz/birch-beer.git
cd birch-beer
docker build -t birch-beer -f ./Dockerfile .
Usage
For a more detailed look at many of the features, check out the
too-many-cells README about make-tree, which uses birch-beer to plot
single cell clades with examples. At any point, use birch-beer -h to see the
help. The general usage would be:
birch-beer --input tree.json --labels-file labels.csv
Tree format
The input tree format should be a json file with a recursive structure. An
object is represented by [{"_distance": DOUBLE, "_item": [STRING]},
[SUBFOREST]], where "_distance" and "_item" are optional (otherwise use
{}), having "_distance" for inner nodes and "_item" for leaves. Supports
rose trees as well! For example:
[{"_distance": 0.8}, [[{"_item": ["1", "2"]}, [[{"_item": ["3", "4", "5"]}, []], [{"_item": ["6", "7"]}, []]]], [{"_item": ["8", "9", "10", "11"]}, []]]]
Example conversion from R
To get to the required format, here is an example to get from an R hclust tree
to the appropriate json.
library(dendextend)
library(data.tree)
library(jsonlite)

# Get hclust tree.
hc = hclust(dist(USArrests), "ave")
# Get dendrogram.
dend = as.dendrogram(hc)
# Get nicely formatted tree from dendrogram.
tree = as.Node(dend)
# Convert to JSON
json = toJSON(as.list(tree, mode = "explicit", unname = TRUE))
# Write to file
cat(json, file = "tree.json")
Saving this file as tree.json, we continue to format as such (this could be a
single command, but was split to make clearer). Here, we use
jq , the command line json processor.
cat tree.json \
    | jq -c 'walk( if (type == "object") then (if (has("leaf") | not) then del(.name) else . end) else . end)' \
    | jq -c 'walk( if (type == "object") then del(.members) | del(.midpoint) | del(.value) | del(.plotHeight) else . end)' \
    | jq -c 'walk( if (type == "object") then (if (has("leaf")) then ._item = .name | del(.name) else . end) else . end)' \
    | jq -c 'walk( if (type == "object") then (if (has("leaf") | not) then [{}, [.children[]]] else . end) else . end)' \
    | jq -c 'walk( if (type == "object") then (if (has("leaf")) then [{_item}, []] else . end) else . end)' \
    > formatted_tree.json
Then we can see the tree using birch-beer.
birch-beer -i formatted_tree.json
Labels format
To assign labels (and thus colors) to the elements within the tree, make a csv
file with an item,label format. Both columns are treated as strings, so
anything can be used as long as the item column matches the item strings in
the tree. For example to go with the above tree:
item,label
1,1
2,1
3,2
4,2
5,2
6,3
7,1
8,1
9,3
10,3
11,2
Select examples
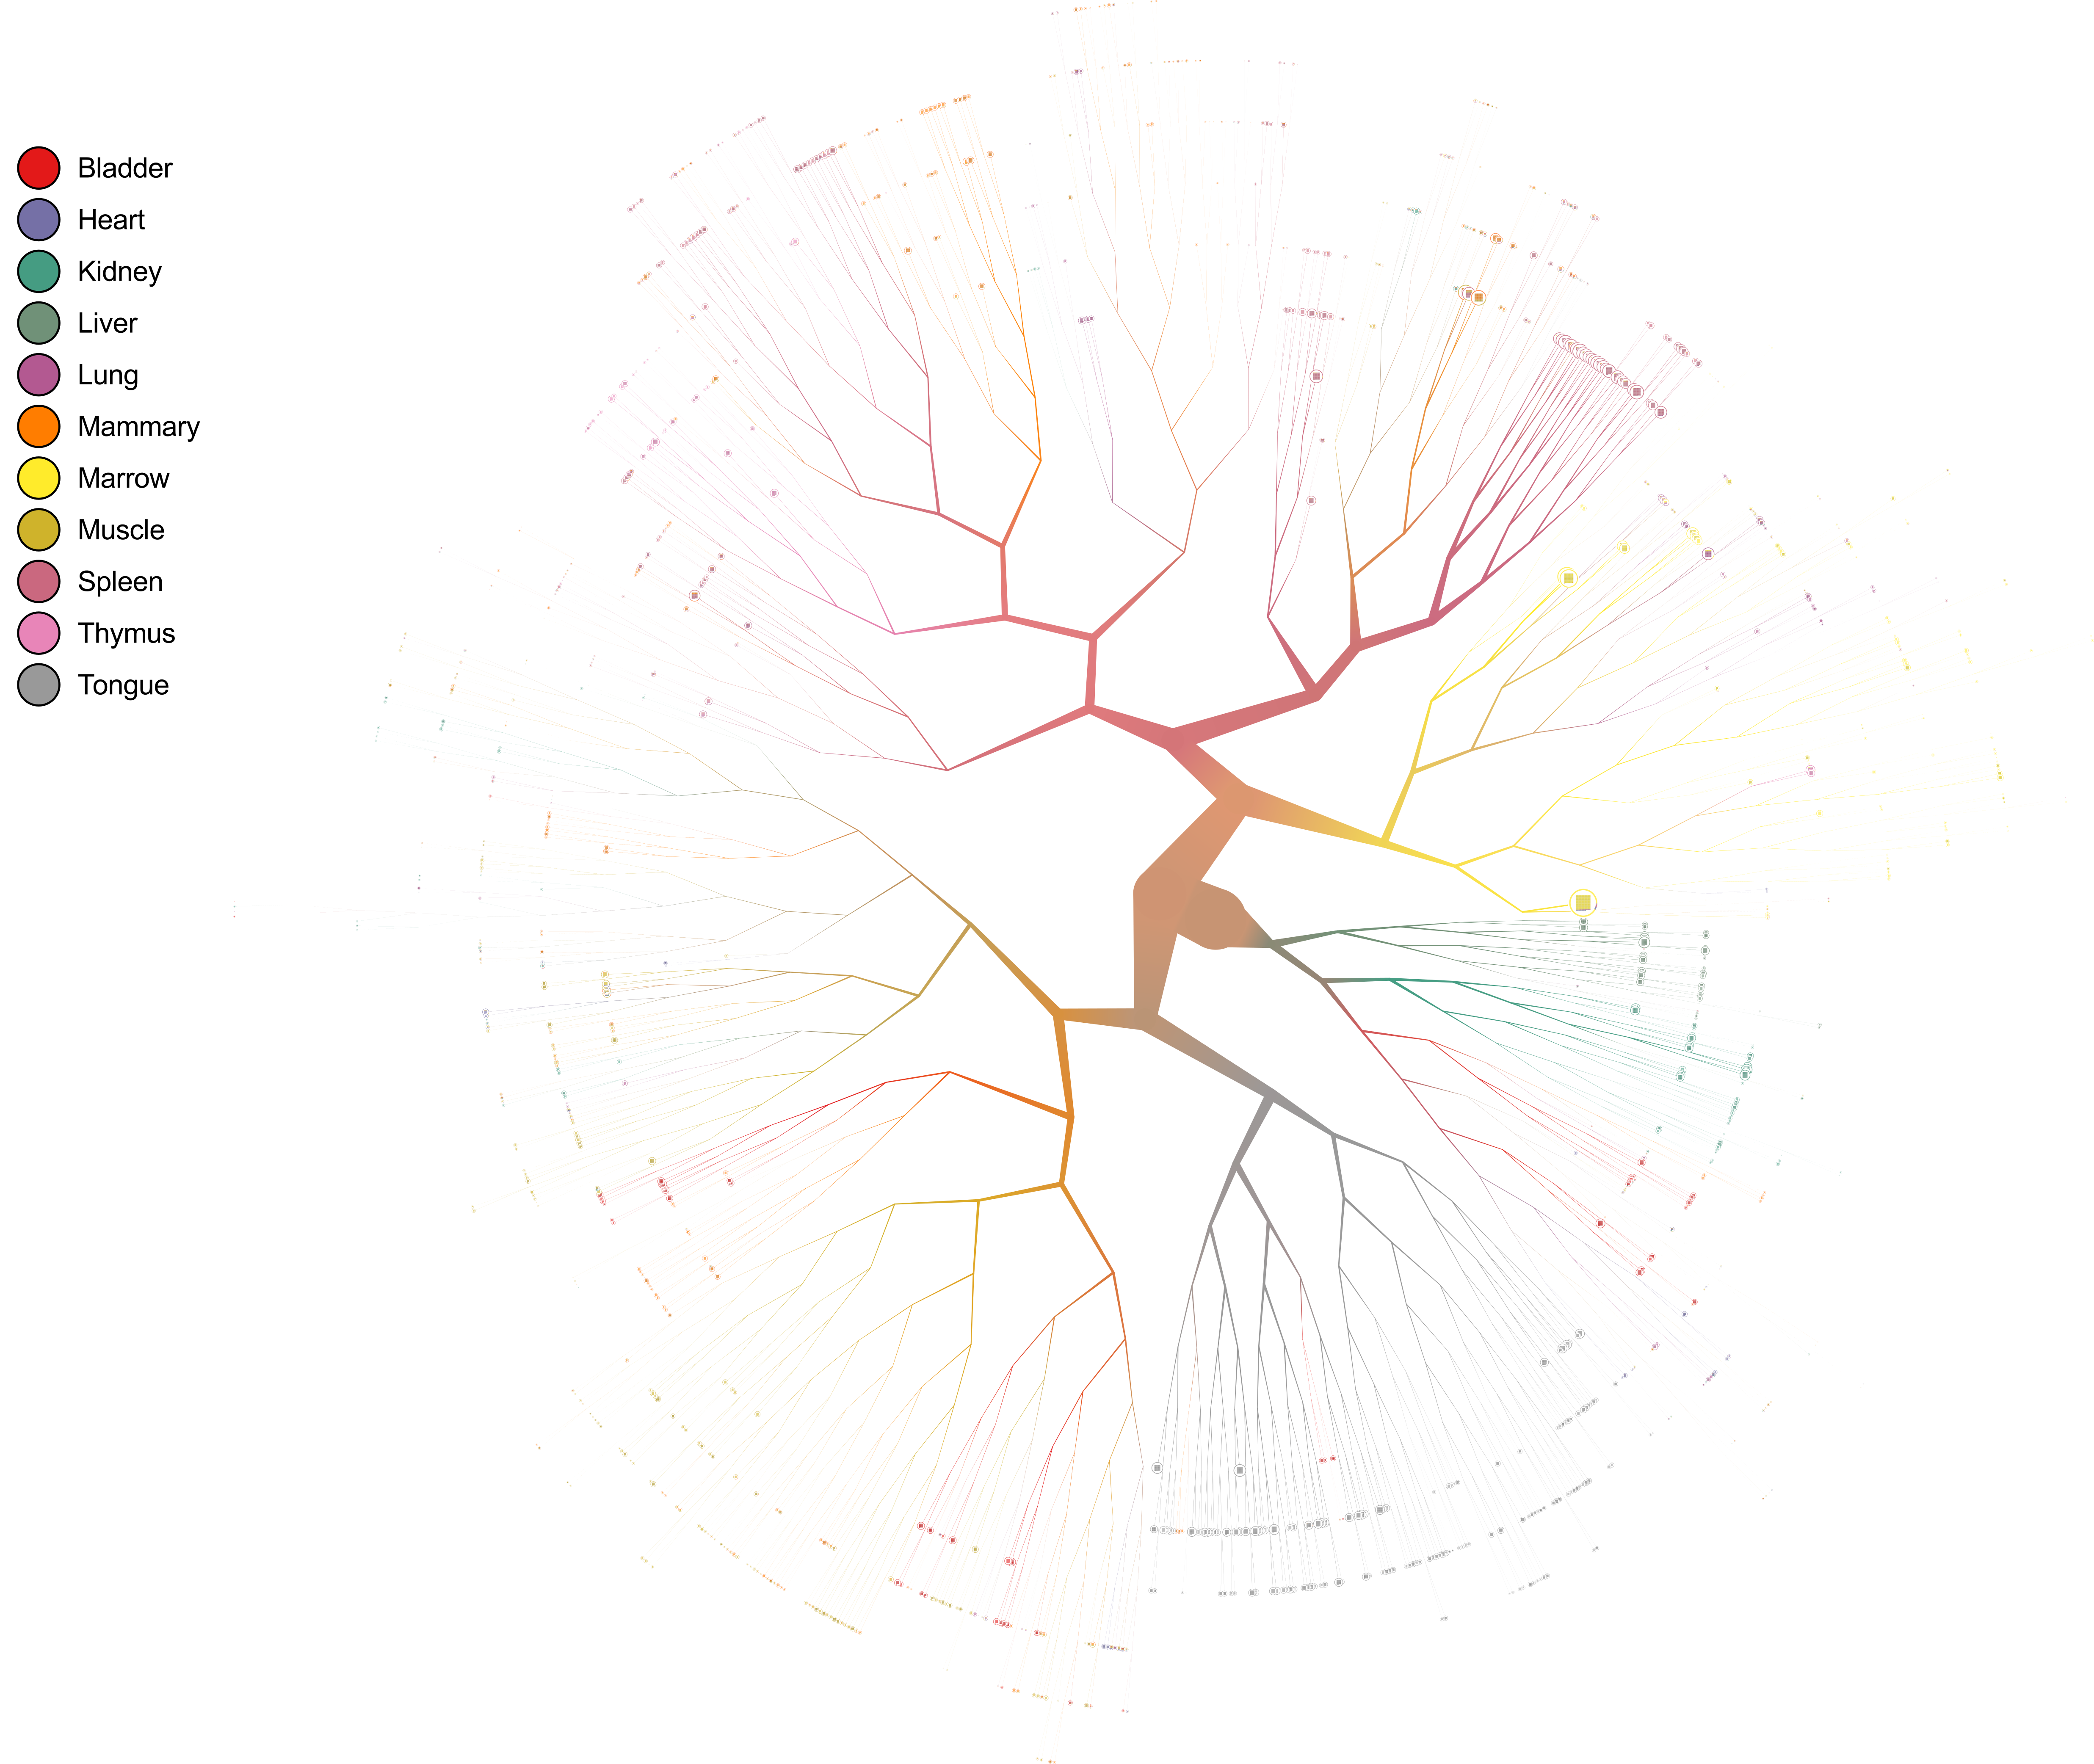
Large tree
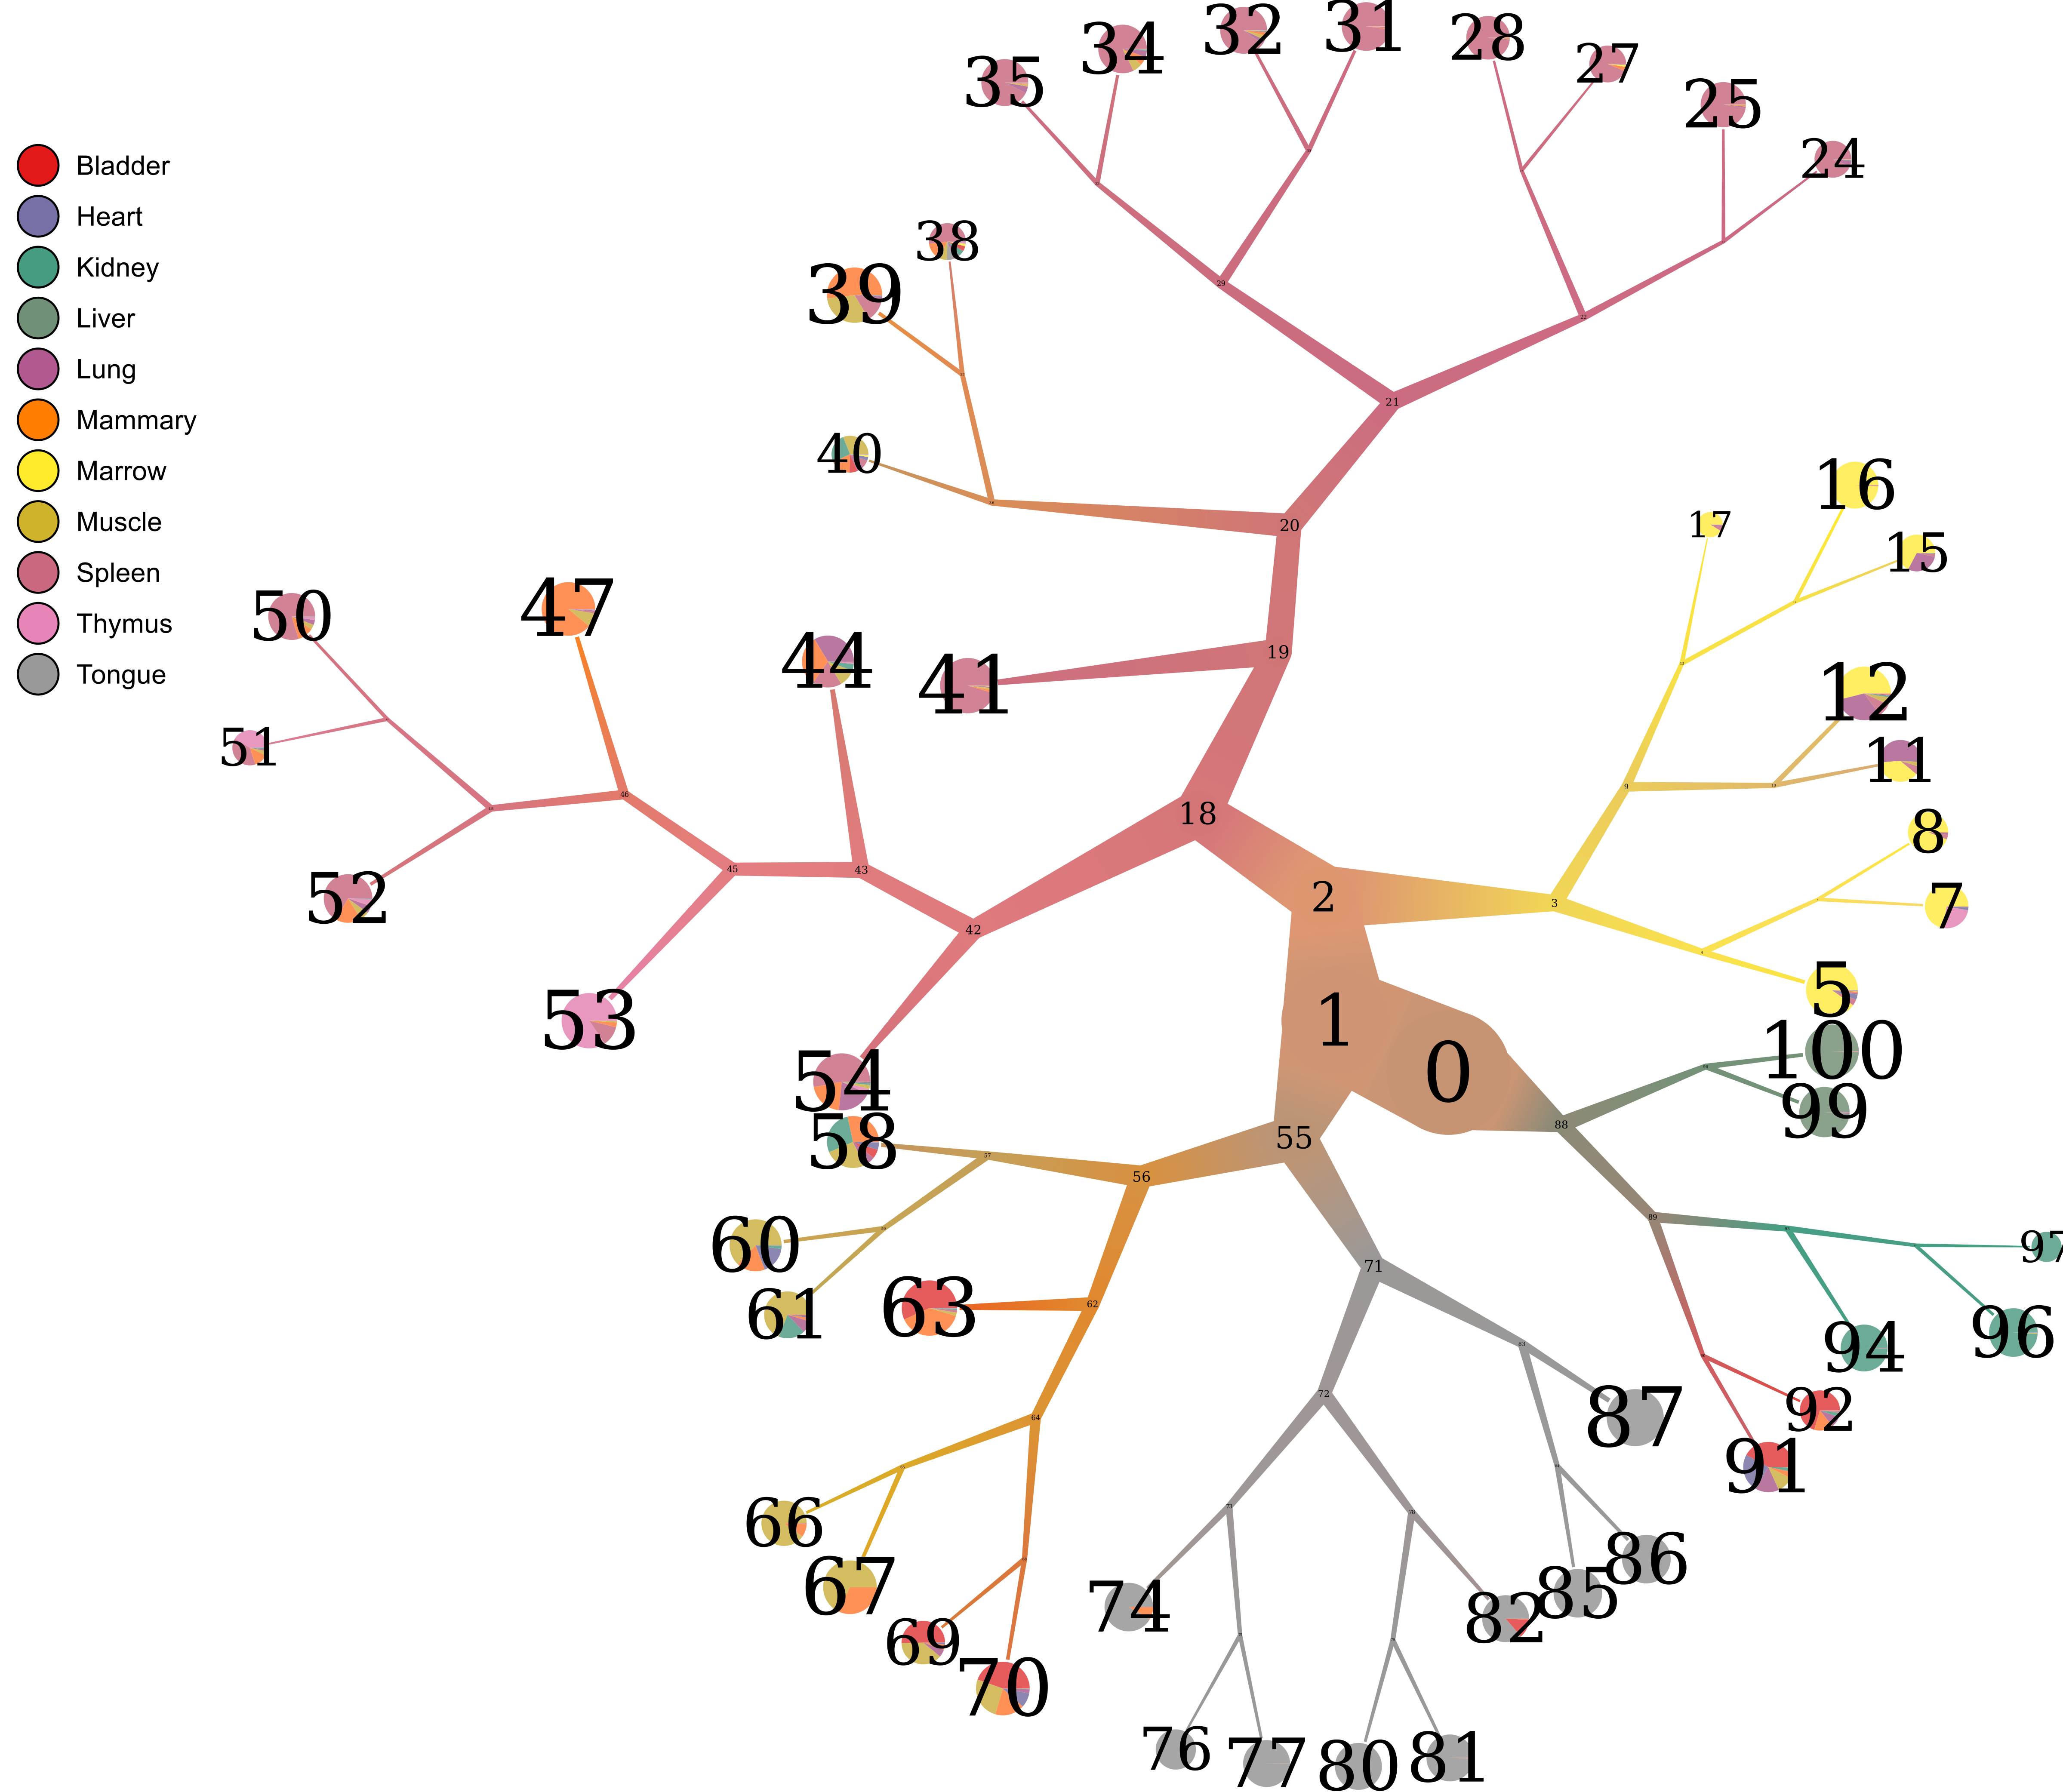
Number overlay
Distance overlay

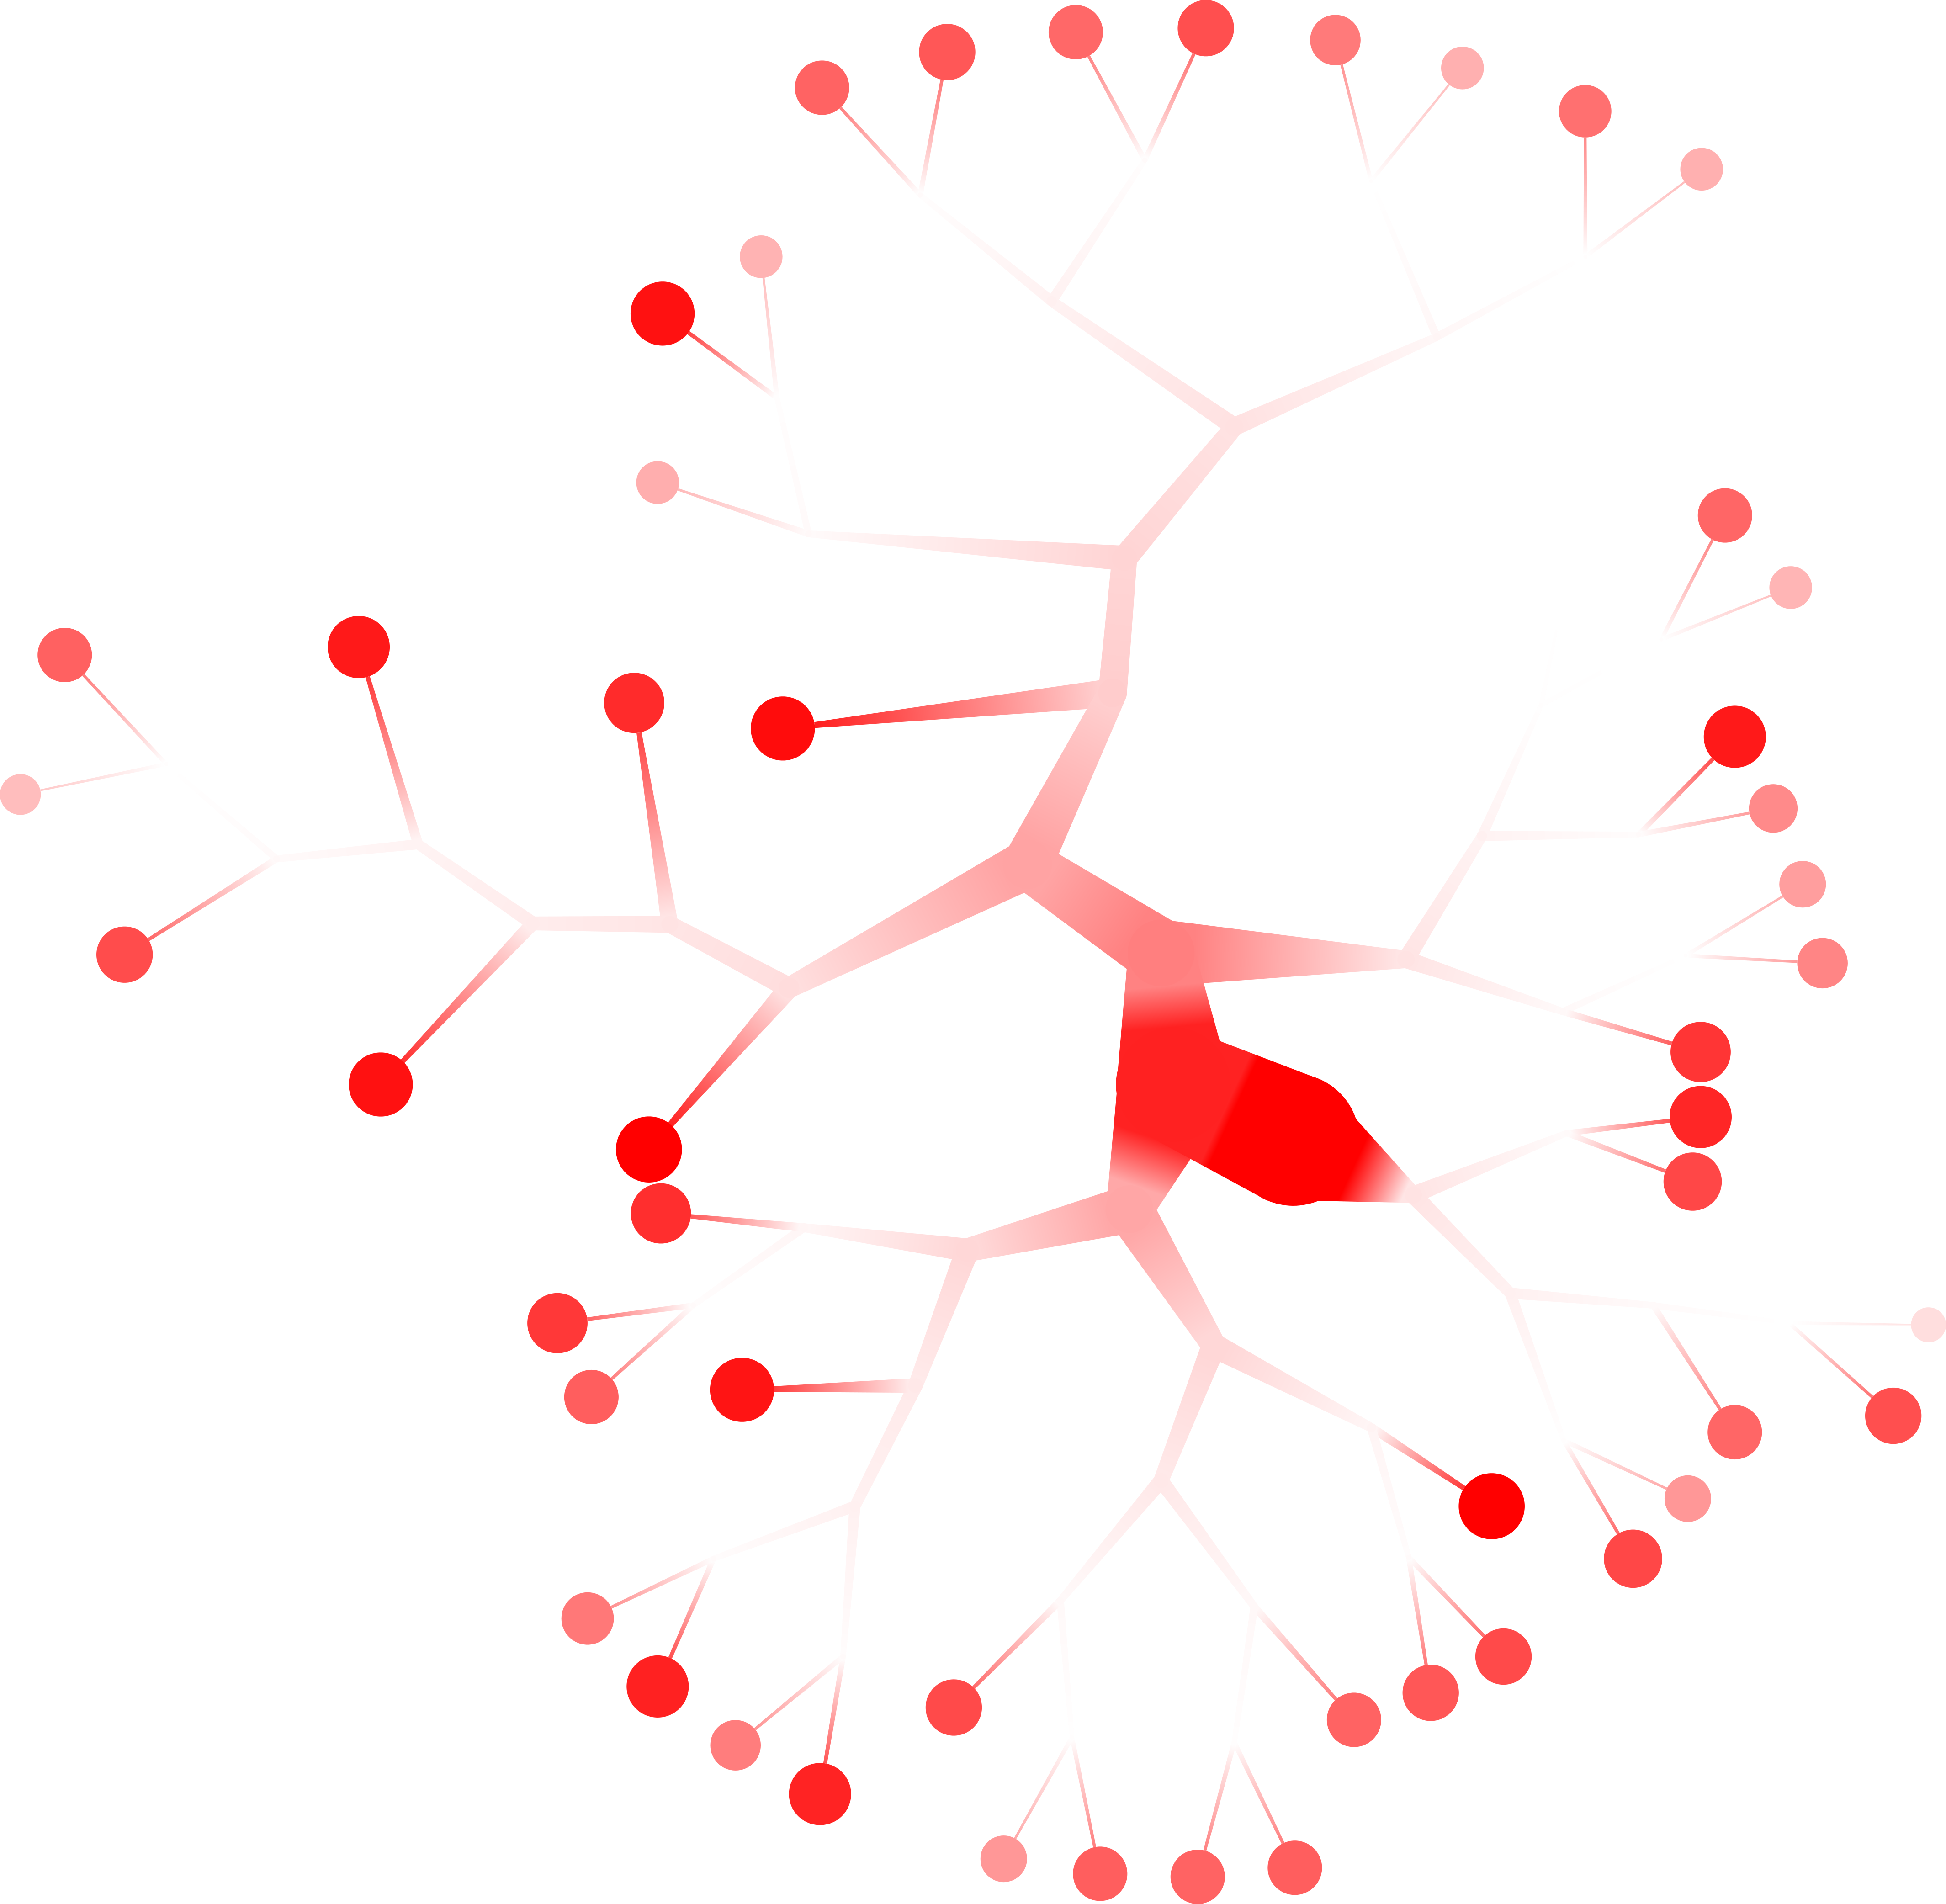
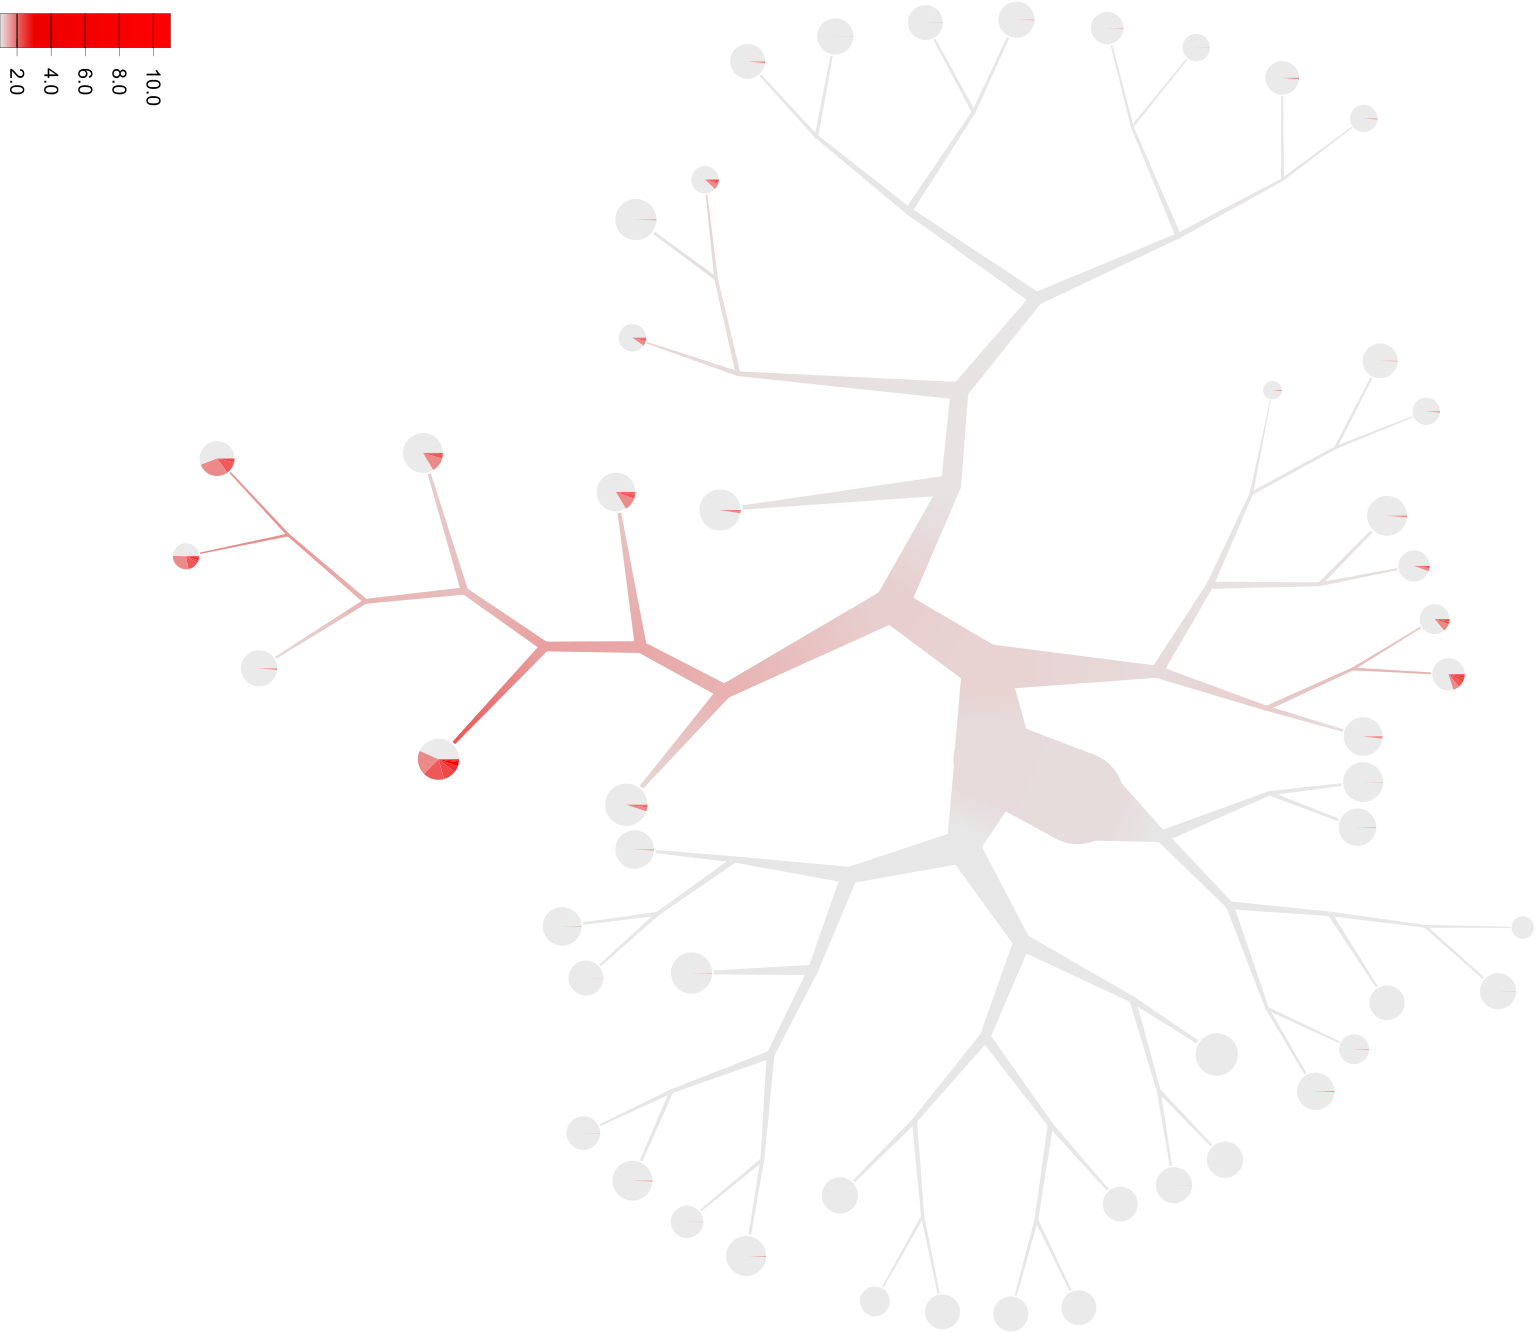
Continuous color saturation
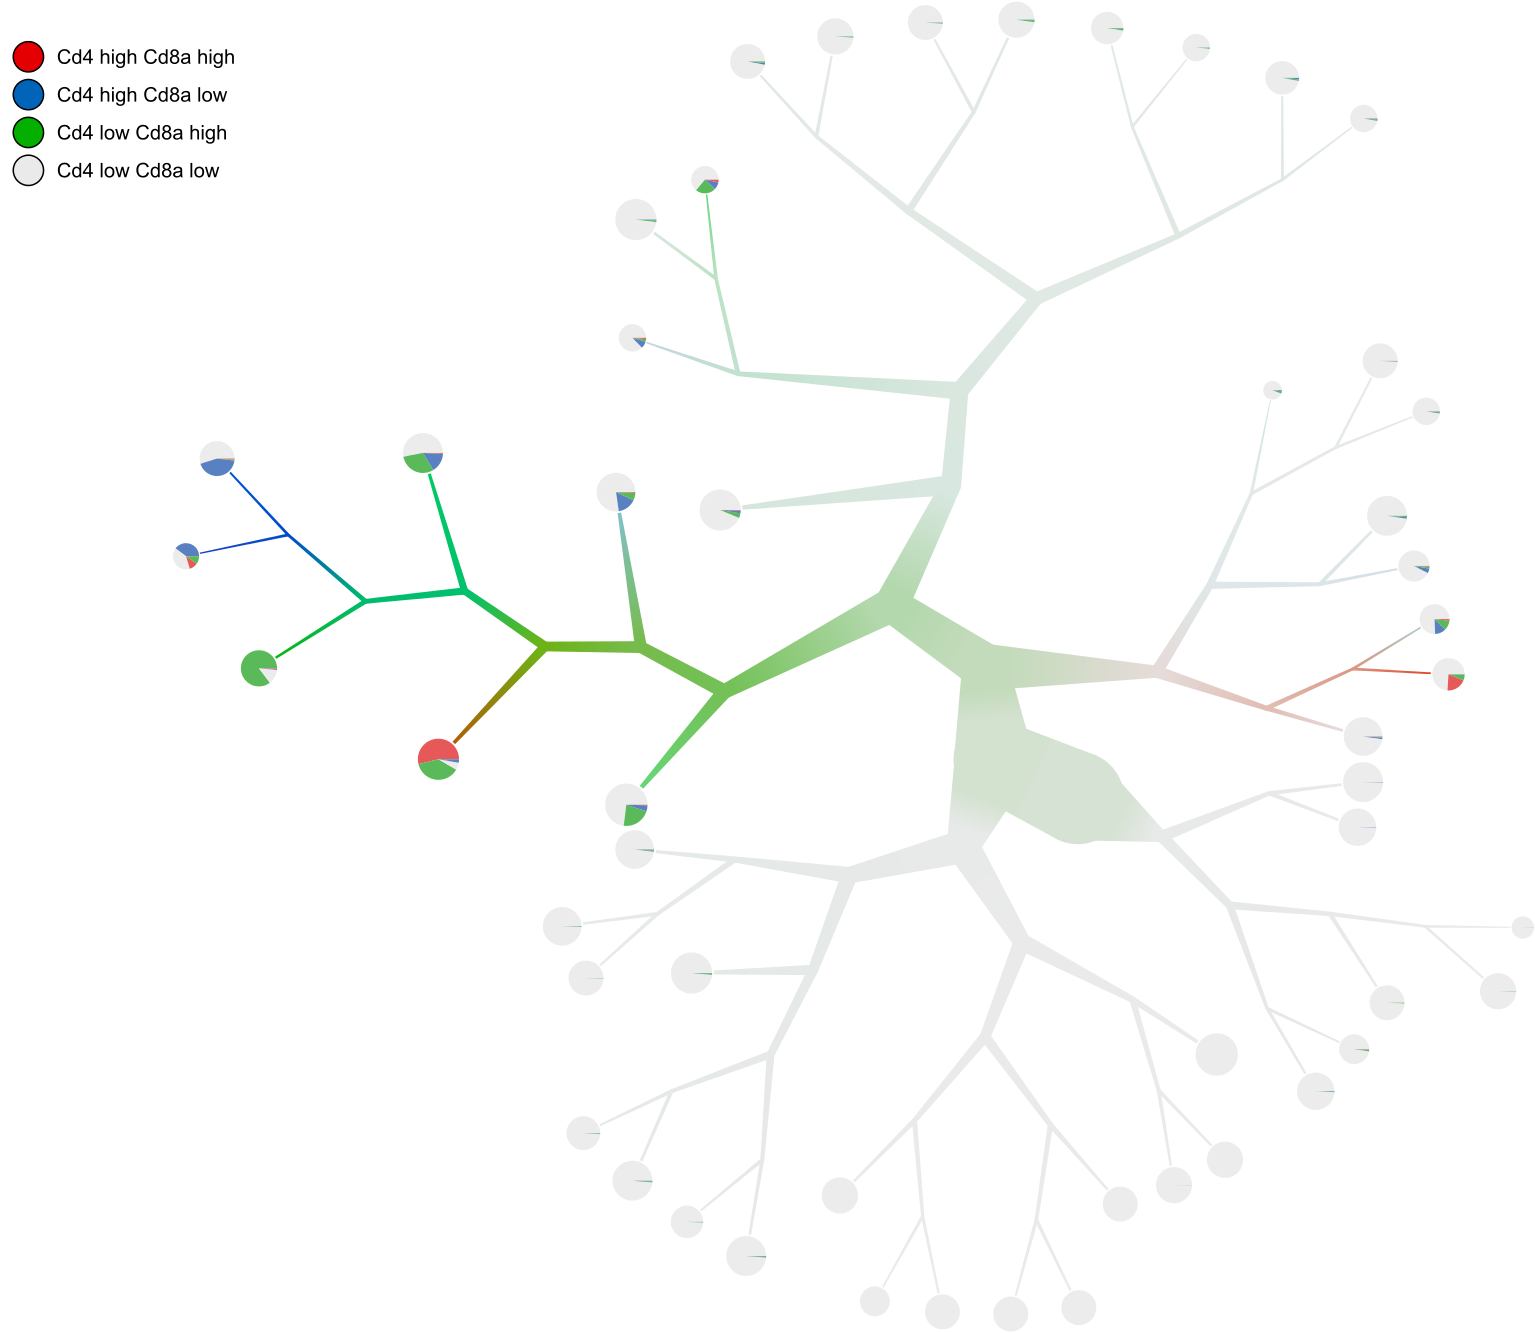
Continuous multi-color saturation
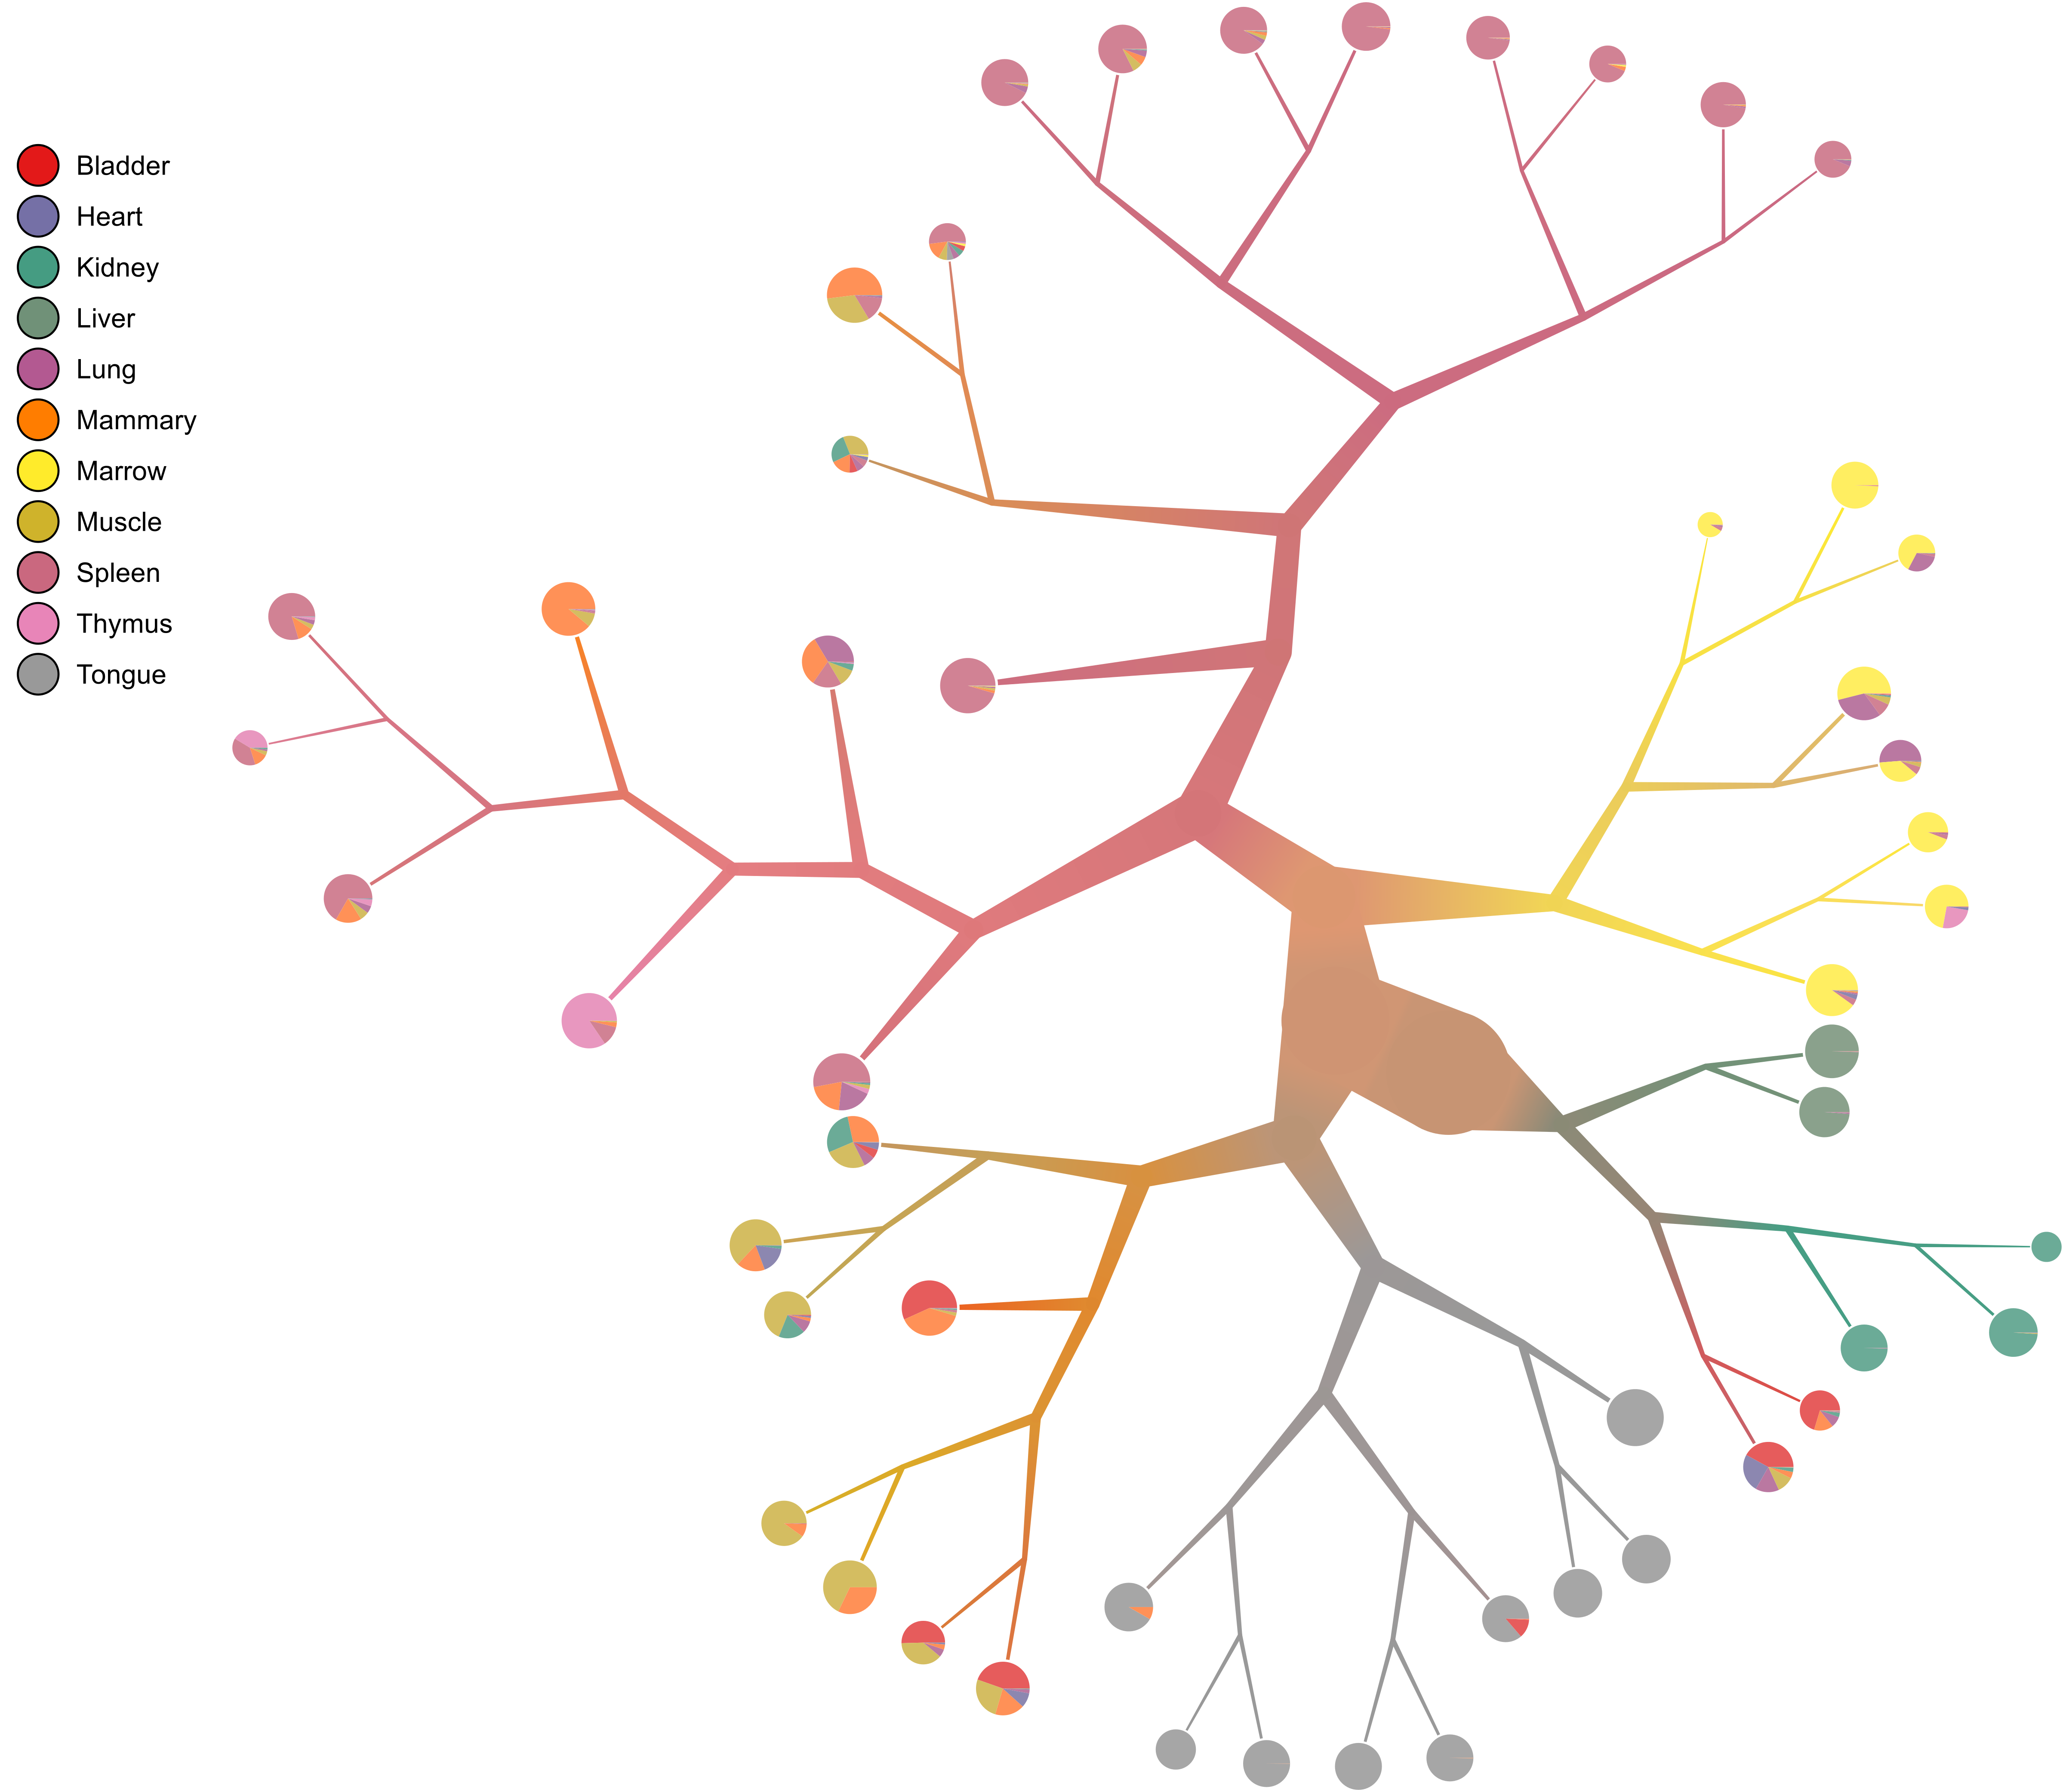
Diversity of labels